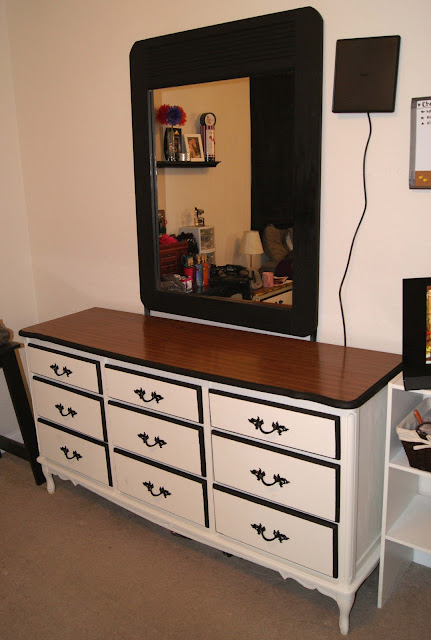
Just wanted to show off my newest project i've been working on..
I re-did my dresser!
My dad had it in his garage for god only knows how long.. collecting dust. So I took it and promised I would one day revamp it.
It took me forever, since I work a lot, so I could only do a little here and there.
It took me forever, since I work a lot, so I could only do a little here and there.
Besides, gold and yellow? So ugly.
(I have a night stand table as well,
(I have a night stand table as well,
but I only took pictures of the actual dresser.)
I'm so happy that it's finally done, I absolutely love it! :)
BEFORE:
AFTER:
sooo easy, just time consuming.
these are my step-by-step directions for anyone
that has trouble getting started..
step 1: remove handles and wipe down the dresser and all drawers.
step 2: sand until all surfaces are rough feeling, then wipe down again to remove any access dust.
step 3: tape off anything you don't want paint on.
step 4: paint first coat and allow to dry. once dry, paint over anything you missed until all is smooth. (my paint already had primer in it, but I still went over everything twice.)
step 5: while drying, I spray painted all the drawer handles black. once dry, I went over them a second time. I also spray painted the mirror.
step 6: screw all handles back on put drawers back and you're finished!!
DURING:
..and another one
looks soooo much better!!
enjoy!! :D
enjoy!! :D
xoxo
lindsey ellen


No comments:
Post a Comment